Monday, 11 October 2010

Reservoir Dogs-Remake Evaluation
Introduction
 For this task we have been asked to,in groups, remake an opening of a film. I am in a group with Jodie Nason and Jack Thornton, We have chosen to remake the opening of Reservoir Dogs by Quentin Tarantino, however we looked a other films before making our final choice, We looked at Shes The Man, Juno and Saturday Night Fever but after discussing it with the group we decided to go with Reservoir Dogs as it was different from the others and the film has a good concept. Reservoir Dogs was made in 1992.
Planning

In total we needed 8 people for the acting of the characters in the film.

Timings

 To sort out the timings we played the original film and paused it every time a new scene, title or person came on screen, not to mention the actions of all the characters and the angles of the camera also had to note the way the titles came on and off the screen. when we paused it we noted down what the time was on the screen and what was happening in the scene and what changed to make us pause the film. The timings will help us when it comes to producing our final piece as we will be able to match it with the original to make it as authentic as possible. as it will be authentic it will produce the best results.
 Actors
 As each actor had their own personality and look, we had to plan each of the actors before recruiting them, we did this so the people we choose to play the characters would be able to play the character with clear precise directions and would look like the original even if there physical look is different from the original.
 This is extremely important to the production of our remake because if we were not as organised as we were I don't think that our final movie would be as good as it is. The planning took us about an hour and a half this is be cause we made it very thorough with the timings, what the actors were wearing and much more.
 Recruitment
In the film there are eight, One of our group (Jack) had to be in the film as a last minuet resort, however saying that in my opinion the film came out well with hat sight hiccup. To recruit the actors we asked people we knew, they didn't look exactly like the people in the original however it gives it our own spin on it.

 Action
We started filming on the 4th of october and got all the filming done in the 1hr and 30mins located. We filmed in the school on the netball courts they gave us a nice background for the sequence which nicely matched the film, we also had a voice over which Mr Lower played we recorded this in the radio studio with the equipment shown in the photo. The recording went smoothly and I don't think I would change anything it we did the filming again.
 Editing
 We started the editing on the 7th of October. We edited our film using Premiere Pro. We had to capture the scenes we wanted so we could start to put them together and edit them, we did this by using the capture tool under file, this tool lets you go through the tape and record the parts you want and putting them on your bank for you to use when putting the film together. After getting all the clips captured we were able to start putting them together and changing the speeds of nearly all the clips as in the film they are walking in slow motion we did this by right clicking on the scene and going to speed/duration and just changing the percentage so it will go slower or faster depending on what you want to achieve. We put the scenes together creating the main base, we then went on to creating the titles and adding them into the sequence so they went along with original we had already written down the timings for the titles and the scenes so we were able to get all the timings almost spot on. With both the titles and the scenes done we went on to putting the effects on the film clips for example dissolve/fade-to-black, you can access these effects using the effects column on the left hand side of your document.
Final Result
 Our final result as you can see from the posts above we have created two: one is our final and the other is our final remake and the original, we have done this so you can see the job we have done and how it matches up to the original, it shows that we have analyzed the original thoroughly go give our remake an authentic edge. I am proud of what we have achieved and there would only be a few minor things that i would change if we were to do it again; for example I would probably get actors that look more like the original and get a better location as the school is painted and in the original there are bare bricks. However with the resources we have we have been able to get our remake to the original by a second.
We tried to use the exact font and colour from the original to make our version more authentic.
Thursday, 23 September 2010
Analyzing Film Openings- Zombieland

For this task we have been asked to analyze a film opening, I have chosen zombieland.
My first impressions are that the movie is an action, however after a minuet or so you soon realize that it is a comedy horror.
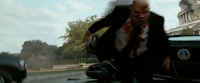 throughout the whole first section of this opening there is a voice over from the main character, telling you about what has happened and what his rules are for survieing are.
First I am going to talk about that camera angles/shots and what affect they give on the film and on the viewer:
 throughout the whole first section of this opening there is a voice over from the main character, telling you about what has happened and what his rules are for survieing are.
First I am going to talk about that camera angles/shots and what affect they give on the film and on the viewer:


 The next angle is pan which is also closely followed by whip pan, this is when the camera moves across the screen. They used pan when they want a close shot however they also want to show the audience the whole scene; In this film it shows you America after the disease hit. The whip pan is used when the character abruptly turns the camera back to the original position when a zombie appears on the screen. Whip pan startles the viewer, which in a way sets the viewer up for the shock of the zombie.
 The next shot is a fast enigma which is also going backwards as the actor is running forwards, an enigma shot gives a element of
 mystery.

 The next shot is a crane shot however it is not static as it comes over the top of the bathroom door, this give the illustion that you are going where ever the character is going, in this case where ever the zombie is going.

 There is a long shot which is followed by a slowmotion shot so you the viewer can get the full sense and view of what is going on. I think that they put it in slow motion so that the viewer can see all the action and to give it a sense of mystery.
http://www.artofthetitle.com/2010/04/05/zombieland/
Monday, 20 September 2010
City Scape
For this task I have created a sequence using different clips from across London, to make this video I used premiere pro by Adobe.
I imported existing clips of London into the clips bank.
I used the cut/razor tool to cut sections out of the clips, I could also move the cut clip to different places in the video to creates a different mood.
To unlink the clip from its sound we used the unlink button so we could delete the existing music and superimpose other music which we imported in.
We added animation e.g. Dissolve to link the clips in a more flowing way.
To change the length/timing of the clip you could also change the speed of which the clip goes fore using the timing button and changing the percentage, to make it quicker you have to put up the percentage, to make the clip slower put the percentage down.
Overall I think all the techniques that I learnt and used on this video have created an end result that I am pleased with.
If I did this task again I think I would make the video the same length as the music as I had to cut the music down to size to fit in with my clips.
Monday, 13 September 2010
Six Picture Sequance

For this task we were sent away in pairs with a camera and we had to create a six picture sequence which told a story. I choose to do someone going to the toilet.
Trainspotting Moodboard

We looked at the opening of the film Trainspotting and were instructed to make a mood board on what we just watched.
Subscribe to:
Posts (Atom)